
Table of Contents
- Why Preparing for a Home Inspection Matters
- Create a Home Inspection Checklist for Buyers and Sellers
- What to Repair vs. What to Leave Alone
- Clean, Declutter, and Ensure Clear Access
- Questions to Ask a Home Inspector Before and During the Inspection
- How Long Does a Home Inspection Take and What to Expect
- Understanding Your Home Inspection Report Examples and Next Steps
- Inspection-Day Logistics and Seller Conduct
- Frequently Asked Questions
Last Updated: October 18, 2026
Why Preparing for a Home Inspection Matters
Learning how to prepare for home inspection is one of the most important steps in any real estate transaction. It gives buyers a clear picture of the property’s condition and helps sellers understand what issues might come up during negotiations.
Sellers who take time to prepare their homes typically experience fewer complications. Buyers who understand what to expect walk away with confidence in their decision. The inspection itself becomes a collaborative conversation rather than a confrontation.
Most people underestimate how much access matters. A home inspector needs to reach the attic, crawl space, basement, and utility areas. If these spaces are blocked by clutter, boxes, or locked doors, the inspector can’t do their job properly. This leads to incomplete reports and, often, requests for a second inspection, which costs everyone time and money.
The goal of preparing for a home inspection is simple: make it easy for the inspector to do thorough work and make it easy for you to understand what they find.
Create a Home Inspection Checklist for Buyers and Sellers
A home inspection checklist keeps you organized and ensures nothing gets missed. Different people need different checklists, though, buyers and sellers have different priorities.
Critical Access Areas
The inspector needs clear access to every part of the home. This is non-negotiable.
Start with the attic. Remove boxes, storage items, and anything blocking the entrance. The inspector needs to check the roof structure, insulation, and ventilation. If they can’t get up there safely, they can’t assess one of the most important systems in the house.
Next, clear your crawl space or basement. These areas reveal a lot about the foundation, moisture problems, and pest activity. Move stored items to a different location. Clear pathways so the inspector can move around without obstacles.
Make sure the electrical panel is visible and accessible. Don’t store anything in front of it or around it. The inspector needs to examine the breaker box and check for any safety issues.
Clear access to the furnace, water heater, and air-conditioning equipment. These systems are critical. An inspector can’t properly evaluate them if they’re surrounded by boxes or hidden behind stored items.
Open any locked doors or gates. Crawl space access, attic hatches, and utility room doors should all be unlocked before the inspector arrives.
Safety Systems and Appliances
Test all smoke detectors and carbon monoxide detectors before the inspection. Replace any batteries that are low. If a detector isn’t working, the inspector will note it as a deficiency.
Check that all light bulbs work. Replace any burned-out bulbs throughout the house. This seems minor, but it affects the inspector’s ability to see inside cabinets, closets, and dark corners.
Make sure doors and windows open and close smoothly. The inspector will test them. Stuck windows or doors that don’t latch properly get flagged in the report.
Check water pressure at multiple faucets. Turn on the kitchen sink, bathroom sink, and shower. If water pressure is low, it might indicate a plumbing issue that needs attention.
Look for leaky faucets. Dripping taps suggest worn washers or valve problems. These are easy fixes, but they’re noticed during inspection.
Test major appliances. The refrigerator, oven, and dishwasher should all be in working order. If an appliance doesn’t work, the inspector documents it.
|
Preparation Task |
Why It Matters |
Who Benefits |
|---|---|---|
|
Clear attic and crawl space access |
Allows structural and insulation inspection |
Both buyer and seller |
|
Unlock electrical panel |
Enables safety evaluation |
Both parties |
|
Test smoke and CO detectors |
Demonstrates safety compliance |
Buyer’s peace of mind |
|
Replace burned-out bulbs |
Improves visibility for inspection |
Inspector’s thoroughness |
|
Clear access to HVAC and water heater |
Allows system evaluation |
Both parties |
|
Check water pressure and faucets |
Reveals plumbing issues early |
Seller avoids surprises |
What to Repair vs. What to Leave Alone
This is where many sellers make mistakes. The instinct is to fix everything before the inspection. That’s not always the right call.
Here’s the reality: if you repair something and the repair isn’t done correctly, the inspector will catch it and note it anyway.
Focus on safety issues first. If there’s a loose electrical outlet, a damaged step, or a missing handrail, fix it. These are liability risks.
Leave cosmetic issues alone. Scuffed walls, outdated fixtures, and worn carpet don’t need to be repaired before inspection. These are negotiating points, not deal-breakers.
For systems that are aging but functional, leave them as-is. If your furnace is 15 years old and working, don’t replace it.
The middle ground is maintenance. Clean your furnace filter. Have your AC unit serviced if it hasn’t been checked recently. These routine maintenance tasks show the inspector that you’ve cared for the home.
Document any repairs you have done. Keep receipts and permits. If you’ve recently replaced a roof, fixed plumbing, or updated electrical work, have that documentation ready.
Clean, Declutter, and Ensure Clear Access
The day before the inspection, do a final walkthrough. Clean the home thoroughly, not just surfaces, but also inside cabinets where the inspector might look.
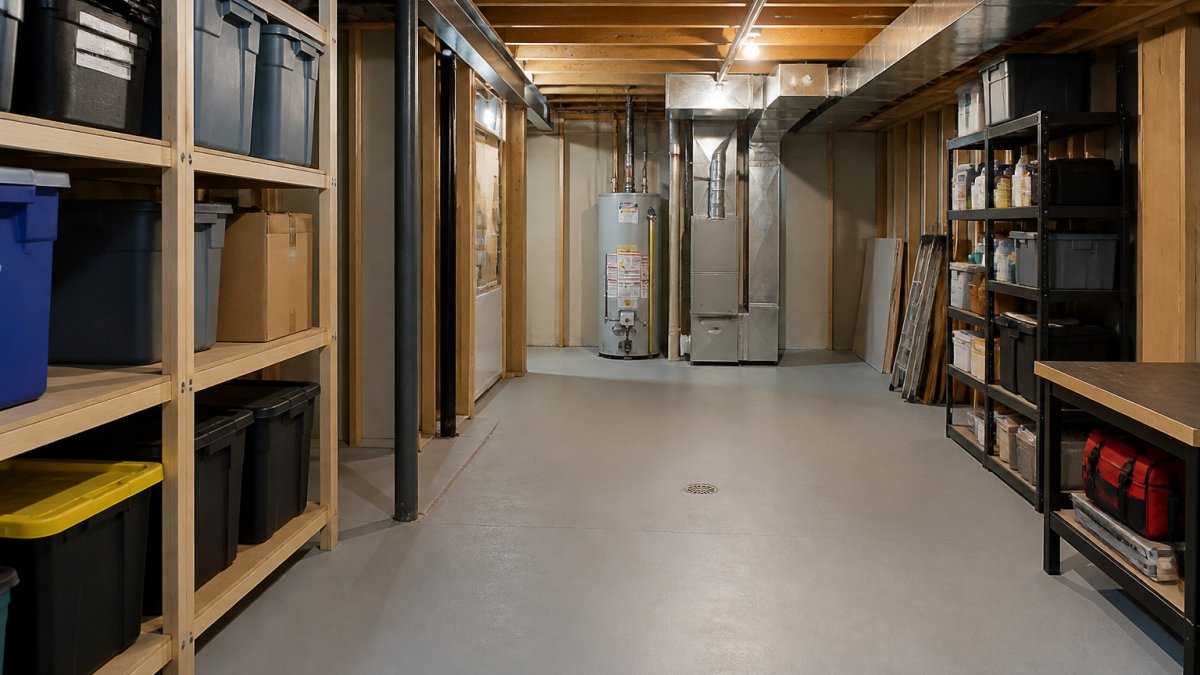
Remove personal items from countertops and shelves. The inspector needs to see the actual condition of the home, not your décor. Pack away family photos, mail, and clutter.
Move cars out of the driveway if possible. The inspector needs room to park and access the exterior of the home.
Check the yard. Trim back bushes and trees that might hide roof lines or siding. Make sure the inspector can see the entire exterior of the house.
Ensure all doors are unlocked. This includes interior doors, exterior doors, gates, and any utility access points. An inspector shouldn’t have to ask you to unlock something.
Turn on all lights inside the home. This helps the inspector see clearly in every room. It also shows that electrical systems are functioning.
Clean windows and glass doors. Dirty windows make it harder for the inspector to see outside and harder for them to move through the home comfortably.
Questions to Ask a Home Inspector Before and During the Inspection
Asking the right questions shows you’re engaged and helps you understand the inspection process better.
Before you prepare for home inspection, ask about the inspector’s credentials. What certifications do they hold? Are they a National Housing Code Certified Inspector? Do they belong to professional organizations like InterNACHI or ASHI?
Ask how long the inspection will take. Most home inspections take two to four hours, depending on the home’s size and age. Knowing the timeline helps you plan your day.
Ask what tools or technology the inspector uses. Modern inspectors might use thermal imaging or drone technology to assess hard-to-reach areas. Understanding their process sets expectations.
During the inspection, ask the inspector to explain what they’re looking at. Don’t be shy. Ask why they’re checking something or what a particular finding means.
Ask about the report format. Will you get a same-day report? How detailed will it be? Will it include photos? These details affect how quickly you can move forward.
Ask about areas of concern as they come up. If the inspector finds something, ask them to walk you through it.
How Long Does a Home Inspection Take and What to Expect
Most home inspections take two to three hours for a typical single-family home. Larger homes or properties with additional features like pools or guest houses take longer.
The inspector will start outside, examining the roof, siding, foundation, and landscaping. They’ll look for visible damage, signs of water intrusion, and structural issues.
Next, they’ll move inside. They’ll check every room, looking at walls, ceilings, floors, and windows. They’ll test light switches, outlets, and appliances. They’ll examine plumbing under sinks and in bathrooms.
The inspector will then access the attic, crawl space, and basement. They’ll examine the foundation, check for moisture or pest damage, and inspect mechanical systems like the furnace and water heater.
Finally, they’ll compile their findings. At Zenith Property Inspections, we provide same-day reports so you get answers quickly. The report documents what was inspected, what was found, and what issues need attention.
During the inspection, you can walk along with the inspector if you’d like. Many people do. This gives you a chance to ask questions and understand the home’s condition in real-time.
Understanding Your Home Inspection Report Examples and Next Steps
The inspection report is your roadmap. It tells you what’s working, what needs attention, and what’s a safety concern.
Reports are typically organized by system: structural, electrical, plumbing, HVAC, and appliances. Each section lists what was inspected and any findings.
Findings are usually categorized by severity. Safety issues are flagged as urgent. Items that need maintenance or repair are noted separately. Items that are aging but still functional might be listed as informational.
Photos are often included in reports. These show specific issues and help you understand what the inspector found.
Once you receive the report, review it carefully. Make a list of items that concern you. Prioritize safety issues first, then items that affect the home’s functionality.
If you’re a buyer, use the report to decide your next steps. Do you want to renegotiate the purchase price based on findings? Do you want the seller to make repairs?
If you’re a seller, understand that the report will be shared with the buyer. Prepare for conversations about findings. Be ready to discuss what repairs you’re willing to make and what you’re not.
Inspection-Day Logistics and Seller Conduct
On inspection day, plan to be present but not hovering. The inspector needs space to work and access to all areas of the home.
Unlock all doors and access points before the inspector arrives. Make sure gates, attic hatches, and crawl space entrances are open.
If you have pets, secure them in a separate room or outside. Pets can distract the inspector and create safety issues.
Stay available to answer questions, but don’t follow the inspector room to room. Let them work.
Don’t make excuses for problems. If the inspector finds an issue, acknowledge it.
Avoid defensive comments. If the inspector notes that something needs repair, that’s not a personal criticism. It’s a factual observation. Stay professional and neutral.
If the inspection reveals something unexpected, resist the urge to panic or get angry.
For sellers, remember that a thorough inspection actually works in your favor. It reduces the chance of a deal falling apart after closing due to undisclosed issues.
A well-prepared home inspection protects both buyers and sellers. It gives you clarity about the property’s true condition and helps everyone move forward with confidence.
Frequently Asked Questions
What is the biggest red flag in a home inspection?
Structural issues, electrical hazards, and HVAC system failures are among the most serious red flags. However, foundation cracks, roof damage, water intrusion, and failing plumbing or septic systems can cost thousands to repair. A certified home inspector will identify these during the inspection process. Less obvious but equally critical issues include mold, asbestos, and inadequate grounding in the electrical panel. These problems affect both safety and resale value, making them primary negotiation points after inspection findings are disclosed.
How clean does my house need to be for a home inspection?
Your home should be clean and clutter-free, but it doesn’t need to be showroom-ready. The inspector needs clear access to all areas: attic, crawl space, basement, electrical panel, furnace, water heater, and appliances. Remove boxes, storage items, and personal clutter blocking these spaces. Clean windows and light fixtures so the inspector can test them. Dirty conditions won’t fail the inspection, but excessive clutter prevents the inspector from doing their job thoroughly and may raise concerns about maintenance.
Should I be home during the home inspection?
Yes, being home during the inspection is recommended. It allows you to answer questions about maintenance history, repairs, and known issues. You can also learn directly from the inspector about problems they find and what they mean for your property. However, give the inspector space to work independently. Don’t follow them room-to-room or attempt to explain away findings. If you’re a seller, your presence shows transparency and willingness to address concerns. If you’re a buyer, attending helps you understand the property condition firsthand.
What should I bring to a home inspection?
Bring maintenance records, repair receipts, permits for any renovations or upgrades, and documentation of system replacements (furnace, roof, water heater, air-conditioning unit). Have a notepad or phone ready to take notes. Bring keys to locked areas, attic access points, and utility closets. If you’re a buyer, bring a flashlight, camera, and a list of questions for the home inspector. Wear comfortable shoes and clothes you don’t mind getting dirty. These items help the inspector access all areas and give you a complete understanding of the property’s condition and history.