
Table of Contents
- What to Inspect: Pool Shell, Surface, and Interior Finish
- Pool Plumbing Leak Detection and Assessment
- Pool Pump and Filter Inspection Essentials
- Skimmers, Returns, Main Drains, and Water Quality
- Heaters, Controls, Timers, and Electrical Equipment
- Pool Safety Inspection Checklist and Compliance
- Using a Pool Inspection Report Template and Recording Findings
- Frequently Asked Questions
Last Updated: October 13, 2026
What to Inspect: Pool Shell, Surface, and Interior Finish
A thorough pool and plumbing inspection checklist starts with the shell, surface, and interior finish, the elements that determine whether your pool holds water.
Examine the shell for cracks, structural damage, or settling. Walk the perimeter for hairline fractures or separation between shell and deck; small cracks expand over time, especially in freeze-thaw cycles.
Tiles, Coping, and Visible Damage
Tiles and coping (the edge trim) take constant abuse from UV, chemicals, and temperature swings. Inspect each tile for cracks, missing grout, or loose pieces; coping should be secure and free of chips or separation from the deck.
Test grout integrity with a screwdriver. If grout crumbles or gaps appear, water is penetrating behind the tiles and decaying the shell.
Deck Condition and Drainage
Look for cracks, settling, or heaving concrete, a cracked deck allows water infiltration and destabilizes the shell. Water should slope away from the pool; standing water indicates poor grading.
Pool Plumbing Leak Detection and Assessment
Pool plumbing is where most hidden problems live. Pipes, connections, and fittings deteriorate invisibly until water disappears or damage surfaces.
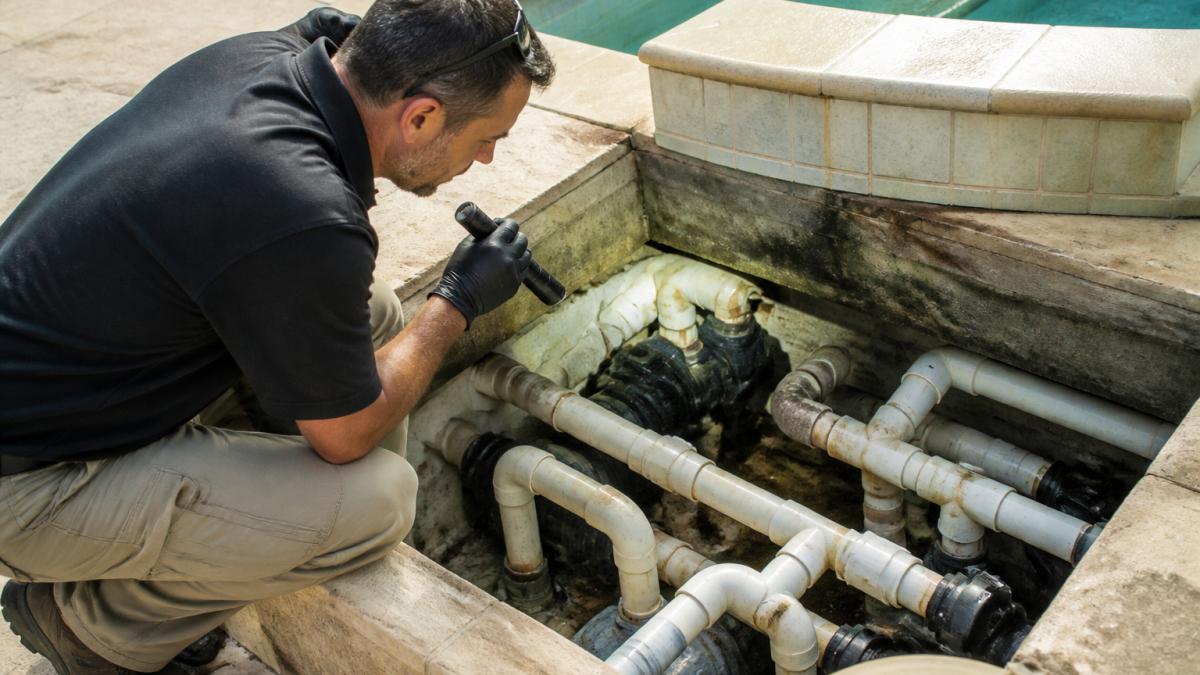
A Repeatable Plumbing Inspection Sequence
Work from the equipment pad outward, then from the pool inward, this isolates the source before you chase buried lines.
- Equipment pad first. With the pump running, inspect every union, valve, fitting, and threaded connection for weeping water, mineral crust, or damp insulation. Most leaks start here.
- Pump and filter housings. Check the shaft seal, pump lid O-ring, filter band clamp, and backwash valve. A wet pad under the pump is the most common finding.
- Above-ground plumbing runs. Trace exposed pipes from the pad to where they enter the ground; note corrosion, staining, or soft decking.
- Pool-side fittings. Inspect skimmer throats, return fittings, the main drain ring, and light niches. Cracked fittings leak into surrounding soil, not the pool.
- Deck and soil indicators. Look for soggy patches, green grass strips, sunken pavers, or puddles that don’t dry after rain.
- Buried lines last. These require pressure testing or acoustic/electronic leak detection, visual inspection cannot confirm or rule out a buried-line leak.
Distinguishing Normal Water Loss from Active Leaks
Pools lose water naturally through evaporation, roughly 0.5 to 1 inch per week in mild conditions, more in hot, dry, windy weather. Beyond that, a leak becomes likely.
The bucket test (do this before calling anyone):
- Fill a bucket with pool water and set it on the top step or a stable deck spot, weighted so it won’t tip.
- Mark the water level inside the bucket and the pool level against a fixed reference (tile line or tape on the skimmer).
- Wait 24 hours with the pump running normally.
- Compare the drops. If the pool dropped noticeably more than the bucket, you have a leak; if both dropped about the same, evaporation is the culprit.
- Repeat with the pump off. More loss with the pump off points to a return line or the shell; more loss with the pump on points to the pressure side or equipment pad.
Measurable Pass/Fail Criteria
A checklist is only useful if each line item has a clear pass or fail. Use these as working thresholds; your equipment’s manufacturer specifications always take precedence.
|
Check |
Pass |
Fail / Investigate |
|---|---|---|
|
Filter pressure vs. clean baseline |
Within 8-10 PSI of clean baseline |
10+ PSI above baseline (dirty filter or blockage) |
|
Return flow at each jet |
Steady, even, no bubbles |
Sputtering, weak, or uneven flow |
|
Pump strainer basket |
Full prime, no air pocket |
Air pocket or churning water (suction-side air leak) |
|
Equipment pad |
Dry |
Any weeping, drip, or mineral crust |
|
Visible pipe fittings |
Clean, no staining |
Green/white crust, rust streaks, damp joints |
|
Deck and soil |
Uniform, dry |
Soggy patches, sunken pavers, green strips |
|
Water loss rate |
≤ 1 inch per week |
> 1 inch per week or bucket test shows pool losing faster than bucket |
Inspecting Pipes, Connections, and Visible Plumbing
Examine all visible plumbing: supply, return, and drain lines and the main drain assembly.
Pressure testing is the standard way to confirm a plumbing leak. Most residential pool plumbing is tested at 20-30 PSI, and a pressure drop over a hold period indicates a leak in the isolated section.
Tools That Make This Section Actionable
A basic kit covers most of a useful plumbing inspection:
- Flashlight or headlamp (equipment pad, skimmer throat)
- Flathead screwdriver (probing grout and fittings)
- Adjustable wrench (snugging unions, do not overtighten)
What a Visual Inspection Cannot Tell You
A visual plumbing inspection can confirm wet spots, corrosion, and obvious fitting failures. It cannot confirm a buried-line leak, quantify a slow leak’s rate, or assess piping inside the pool shell, those require pressure testing, acoustic equipment, or a specialist.
Pool Pump and Filter Inspection Essentials
The pump and filter are the circulation system’s heart. Without proper function, water stagnates, algae blooms, and equipment fails prematurely. This section turns “listen and look” advice into a diagnostic workflow: measure, compare to baseline, trace the symptom to a cause.
Establish a Baseline Before You Judge Anything
You cannot evaluate a pump or filter without knowing what “normal” looks like. Before inspecting, record:
- Clean filter pressure. The PSI reading immediately after a backwash or cartridge cleaning is your baseline. Write it on a label on the filter tank.
- Pump model and rated flow. The nameplate lists horsepower and typically a design flow rate in GPM.
- Filter type. Sand, cartridge, and DE filters have different normal pressure ranges and service intervals.
Without a baseline, a “high” pressure reading is meaningless; with one, it becomes pass/fail.
Circulation System Operation and Pressure
Start the pump and listen. A healthy pump runs smoothly with minimal noise; grinding, squealing, or unusual vibration suggests bearing wear.
Observe the filter pressure gauge. Most residential pools run 15-25 PSI when clean, but the difference from your baseline matters more than the absolute reading.
Feel the return lines during operation.
Symptom-to-Cause Diagnostic Table
Use this to move from observation to action. Each symptom points to a short list of likely causes, ordered from most to least common.
|
Symptom |
Likely Causes (in order) |
First Check |
|---|---|---|
|
Filter pressure 10+ PSI above baseline |
Dirty filter media; clogged skimmer or pump basket; partially closed valve |
Backwash or clean filter; empty baskets |
|
Filter pressure below baseline |
Clogged suction line; worn impeller; air leak on suction side |
Check pump basket and skimmer; inspect pump lid O-ring |
|
Pump loses prime / air in strainer |
Low water level; clogged skimmer line; bad pump lid O-ring; suction leak |
Water level at skimmer; O-ring condition |
|
Grinding or squealing from pump |
Worn bearings; debris in impeller |
Shut off pump; inspect impeller |
|
Water weeping at pump |
Shaft seal failure; loose union; cracked housing |
Tighten union; if seal, plan replacement |
|
Weak or uneven return flow |
Blocked return line; partially closed valve; clogged impeller |
Open valves; check each return individually |
|
Heater not firing |
Low flow; dirty filter; gas supply issue; ignition fault |
Confirm flow and pressure first |
Filter-Specific Checks by Type
Each filter type has its own service rhythm and failure modes:
- Sand filters. Backwash when pressure rises 8-10 PSI above baseline. Sand media typically needs replacement every 5-7 years. Sand blowing back into the pool signals a broken lateral or worn standpipe.
- Cartridge filters. Rinse cartridges at 8-10 PSI above baseline. Deep-clean periodically and replace when pleats stay matted or torn, a torn pleat lets debris through to the returns.
- DE (diatomaceous earth) filters. Backwash on the same pressure rule, then recharge with the correct amount of DE. If DE returns to the pool, inspect the grids for tears. Never run a DE filter without a proper charge.
Tools and Records for This Section
A pump and filter inspection is only repeatable if you record what you measured. Keep on hand:
- Pressure gauge (verify it reads zero when the pump is off, a stuck gauge gives false readings)
- Flashlight for the pump strainer and impeller area
- Adjustable wrench for unions and band clamps
When to Call a Specialist
Some findings are within reach of a careful owner: a dirty filter, a bad O-ring, a clogged basket. Bearing replacement, motor rewinding, impeller replacement on a sealed pump, and any electrical fault inside the motor housing should go to a qualified pool equipment technician.
Skimmers, Returns, Main Drains, and Water Quality
Skimmers pull water from the surface, returns push it back, and the main drain pulls from the bottom, all critical to circulation and safety.
Drain Grates, Return Lines, and Suction Safety
Inspect skimmer baskets for cracks, a broken basket lets debris reach the pump and cause clogs. The skimmer door should seal tightly.
The main drain grate must be secure and crack-free, a broken grate is a suction hazard. Federal anti-entrapment regulations require a dual-drain system or anti-entrapment device on all main drains.
Testing pH, Chlorine, and Signs of Algae
Test pH and chlorine with a kit. Ideal pH is 7.2-7.6; free chlorine should be 1-3 ppm. Out-of-range levels indicate maintenance problems or equipment failure.
Look for green, yellow, or black discoloration on walls, floor, or waterline, algae means sanitizer isn’t working.
Heaters, Controls, Timers, and Electrical Equipment
Inspect the heater for corrosion, leaks, or visible damage. Gas heaters need a clear draft with no vent blockages; electric heaters should have no cracks in the element housing.
Check the control panel for corrosion, loose connections, or water intrusion. All electrical equipment must be grounded and protected by a GFCI breaker.
Pool Safety Inspection Checklist and Compliance
Safety barriers, gates, and equipment protect swimmers and meet legal requirements.
Barriers, Fencing, Gates, and Handrails
Fencing must completely surround the pool with no gaps larger than 4 inches. Gates must self-close and self-latch, with latches at least 54 inches above ground.
Handrails and ladders must be secure and free of rust or corrosion, with non-slip, firmly attached steps. Pull handrails firmly, they should not move.
Ladders, Safety Equipment, and Code Requirements
Check ladders for cracks, corrosion, or missing rungs; steps should be slip-resistant and ladders properly anchored so they don’t shift.
Safety equipment, ring buoys, rescue poles, first-aid kits, must be accessible and in good condition. Many jurisdictions require signage on water depth, drain hazards, and emergency contacts.
Using a Pool Inspection Report Template and Recording Findings
Documentation turns observations into actionable information. A structured pool and plumbing inspection checklist report organizes findings and prioritizes repairs.
Inspection Scope, Limitations, and When to Call a Specialist
A standard pool and plumbing inspection checklist covers visible components and basic function tests. It does NOT include:
- Underwater camera inspection of pipes or drains
- Pressure testing of buried plumbing
- Structural assessment of the pool shell
If you suspect a serious leak, structural damage, or electrical problems, hire a specialist, a certified pool inspector, plumber, or engineer can provide detailed assessment and repair cost estimates.
Prioritizing Findings by Repair Urgency
Organize repairs by urgency:
Critical (within days):
- Active leaks causing water loss
- Non-functional circulation or filtration
- Broken drain grates or suction hazards
Important (within weeks):
- Out-of-range water chemistry
- Algae growth
- Corroded plumbing connections
Monitor (within months):
- Minor deck cracks
- Cosmetic tile damage
- Worn ladder steps
This prioritization helps you budget repairs and avoid panic over non-urgent issues.
A thorough pool and plumbing inspection checklist gives you clear visibility into condition and repair needs. When you need a comprehensive inspection that goes beyond the basics, Zenith Property Inspections provides certified pool and plumbing assessment with same-day reporting and detailed findings.
Frequently Asked Questions
What should a pool and plumbing inspection include?
A comprehensive pool and plumbing inspection covers the pool shell and interior finish, tiles and coping, deck condition and drainage, pump and filter operation, plumbing pipes and connections, skimmers and drains, heater and controls, water quality, and safety barriers. The inspection should identify visible damage, leaks, equipment condition, and code compliance. Professional inspectors use specialized tools and may perform pressure tests on plumbing lines to detect hidden leaks that are not immediately visible.
How do you detect a pool plumbing leak versus normal water loss?
Normal pool water loss is typically due to evaporation, especially in warm weather. A leak is suspected when water loss exceeds this rate consistently or when you notice wet spots around the deck, visible cracks in plumbing, or a sudden drop in water level. To confirm a leak, mark the water level with tape and observe it over 24 hours. If it drops noticeably, conduct a dye test around suspected pipe locations or hire a professional for pressure testing to pinpoint the leak location.
What are common signs that a pool pump or filter needs repair?
Warning signs include unusual noises (grinding, squealing, or rattling), reduced water flow or pressure, visible leaks around seals or unions, the pump running but water not circulating, cloudy water despite chemical balance, and the filter pressure gauge reading higher than normal. If the pump fails to prime or shuts off unexpectedly, the motor may be failing. High pressure on a clean filter indicates the filter needs backwashing or cartridge replacement. Have a certified inspector evaluate any of these conditions.
Should pool plumbing be pressure tested during an inspection?
Yes, pressure testing is a critical part of pool plumbing inspection and is especially important if the pool is older or if you suspect leaks. A pressure test involves isolating the plumbing system and applying air or water pressure to detect leaks in pipes and connections that may not be visible. This test should only be performed by a qualified inspector or pool professional who knows the system’s design pressure limits. If pressure drops during the test, it indicates a leak that requires repair before closing or before taking ownership of the property.
What pool safety features must be inspected for code compliance?
Pool safety inspections must verify that barriers (fencing, walls, or doors) are at least 4 feet high and completely enclose the pool, gates are self-closing and self-latching, drain covers meet current anti-entrapment standards, handrails and ladders are secure and properly installed, and rescue equipment is accessible. Check that no gaps or footholds allow children to climb the barrier. Verify that posted safety signs are visible and legible. Local and state codes may vary, so confirm requirements with your jurisdiction. A certified pool inspector can verify compliance with current regulations.