
Table of Contents
- How Thermal Imaging Works for Home Insulation Assessment
- Conducting an Infrared Home Energy Audit
- Detecting Air Leaks with Thermal Cameras
- Identifying Missing and Settled Insulation
- Thermal Imaging Inspection Cost and ROI
- Best Practices for Thermal Imaging Inspections
- Creating Your Post-Inspection Action Plan
- Frequently Asked Questions
Last Updated: September 18, 2026
How Thermal Imaging Works for Home Insulation Assessment
Thermal imaging for home insulation assessment uses infrared radiation to visualize temperature differences across building surfaces, revealing where heat is escaping or being lost. At Zenith Property Inspections, we use this technology to identify insulation deficiencies that remain invisible to the naked eye, giving homeowners and buyers a clear picture of their property’s thermal performance.
Infrared radiation is electromagnetic energy emitted by all objects above absolute zero. A thermal camera detects this radiation and converts it into a visual map called a thermal signature, where different colors represent different temperatures, revealing where your home’s building envelope is failing.
In thermal signatures, warmer areas appear red or orange and cooler areas appear blue or purple. Thermal contrast, the difference between adjacent areas, reveals where heat transfer is occurring. Thermal bridging, where conductive material bypasses insulation, creates a distinctive signature that stands out immediately.
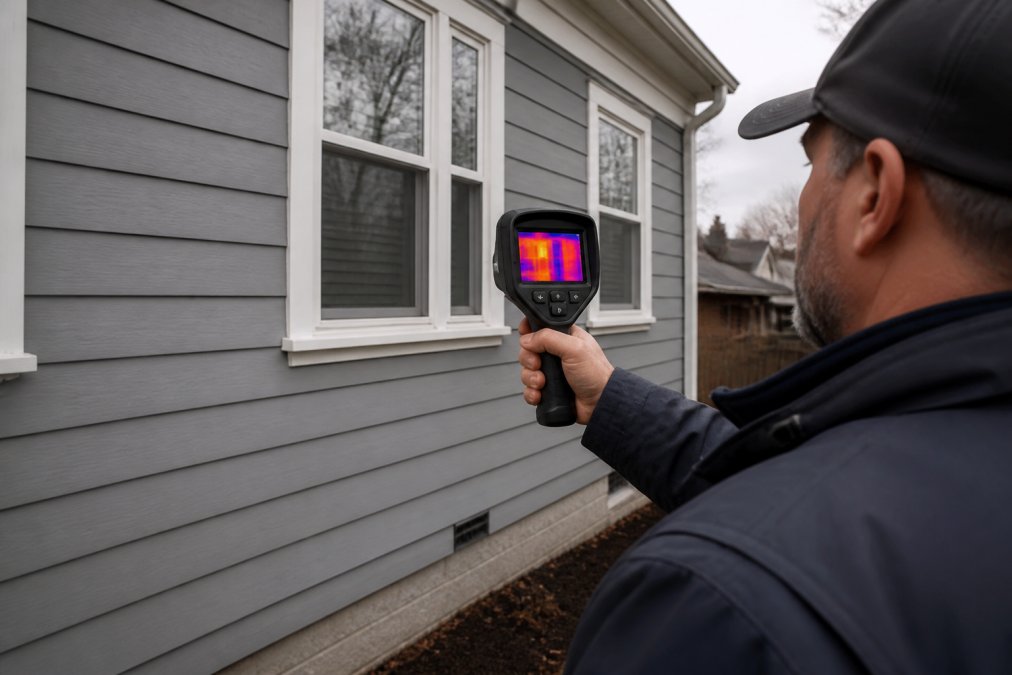
Temperature gradients determine visibility: larger differences between inside and outside create stronger thermal contrast, making insulation problems easier to detect. This is why seasonal timing and delta-T (the difference between indoor and outdoor temperature) are critical.
Understanding infrared radiation and thermal signatures
Most building materials have high emissivity (the ability to emit infrared energy), which is why thermal imaging works reliably for home inspection. The thermal sensor measures infrared energy and assigns a temperature value to each pixel, creating a detailed thermal map.
Consistent coloring across a wall means uniform insulation and minimal heat loss. Streaks, patches, or sudden color changes indicate problems: missing insulation, air infiltration, thermal bridging, or moisture intrusion.
Why temperature gradients matter for detection
Temperature gradients determine how visible a problem becomes on a thermal map. A 15-degree temperature difference between inside and outside is the practical minimum for reliable detection; 20 degrees or more provides excellent contrast.
This is why winter inspections outperform summer inspections for finding insulation problems. Heating creates a large temperature difference between conditioned interior spaces and cold exterior air, producing strong thermal contrast that reveals every gap, void, and thermal bridge.
Conducting an Infrared Home Energy Audit
An infrared home energy audit systematically scans the building envelope using thermal imaging to identify where conditioned air is escaping and unconditioned air is entering. Before scanning, measure indoor and outdoor temperatures, humidity levels, and wind conditions, these environmental factors directly affect thermal contrast and detection accuracy.
Seasonal timing and delta-T requirements
Winter provides the largest temperature difference between heated interiors and cold exteriors, ideal for detecting insulation failures, air infiltration, and thermal leakage. Summer inspections are far less effective because the temperature gradient is minimal.
Delta-T is the numerical difference between indoor and outdoor temperatures. A delta-T of 15 degrees is the practical threshold for reliable detection; 20 degrees provides good results; 30 degrees or more offers excellent visibility.
Plan thermal imaging inspections for December through February when delta-T is naturally high. If inspecting during warmer months, schedule for early morning when outdoor temperatures are lowest.
Environmental conditions for accurate readings
Wind cools exterior surfaces and can mask insulation problems. Inspect on calm days. Direct sun heats exterior surfaces unevenly, creating unrelated thermal signatures, avoid bright sunlight on scanned surfaces. Humidity affects emissivity and can introduce noise into readings.
Ideal conditions: calm, overcast winter days with stable indoor heating, at least 15-degree delta-T, and 24 hours of stable conditions before scanning. Close blinds and curtains, and avoid running exhaust fans or opening windows during the audit.
Detecting Air Leaks with Thermal Cameras
Air infiltration appears as distinctive thermal signatures on thermal maps. Cold air leaking inward creates sharp thermal boundaries where warm interior surfaces meet cold infiltrating air. Air leaks concentrate around penetrations: electrical outlets, light fixtures, plumbing stacks, door and window frames, and transitions between building materials.
Common locations for air infiltration and thermal leakage
Baseboards and wall-to-floor transitions frequently show air infiltration as vertical thermal streaks. Window and door perimeters are predictable leak sources where thermal imaging reveals whether weatherstripping and caulking are effective.
Electrical outlets and light fixtures often lack proper air sealing, showing as cold spots on thermal imaging. Plumbing and HVAC penetrations commonly bypass insulation, creating thermal signatures that pinpoint air leaks.
Attic bypasses, uninsulated or under-insulated paths for air to move from conditioned spaces into the attic, show up as localized warm spots on the attic floor, indicating where heated interior air is escaping.
Interpreting false positives and thermal contrast anomalies
Thermal bridging through framing lumber creates linear thermal signatures that run vertically (studs) or horizontally (plates and rim joists). These are structural, not energy problems. A skilled inspector distinguishes thermal bridging from insulation voids by recognizing the regular spacing and linear pattern of framing. Complex roof junctions often obscure these patterns, making it necessary to evaluate whether flat roof insulation provides a more consistent thermal envelope than traditional attic assemblies.
Exterior thermal signatures caused by wind, sun exposure, or moisture can mimic insulation problems.
Identifying Missing and Settled Insulation
Missing insulation and settled insulation create the clearest thermal signatures. Settled insulation, fiberglass or cellulose that has compressed over time, reduces R-value significantly and appears as a gradual temperature gradient, with warmer areas at the bottom and cooler areas at the top.
Spotting insulation voids and thermal bridging
Insulation voids appear as localized warm spots on the thermal map, indicating where insulation is completely absent. Thermal bridging through metal studs, rim joists, or other conductive materials creates linear thermal signatures that follow the framing pattern, distinguishing them from true insulation failures.
Scanning walls, ceilings, and attic bypasses
Start at the top of each wall and work downward, moving the thermal camera slowly. Scan both interior and exterior surfaces when possible; exterior images reveal insulation quality more clearly due to larger delta-T. For ceilings, scan the entire attic floor, paying special attention to interior partition walls, ductwork penetrations, and transitions between conditioned and unconditioned spaces.
Thermal Imaging Inspection Cost and ROI
The cost of a professional thermal imaging inspection depends on property size, complexity, and whether it is standalone or bundled with a general home inspection. Return on investment comes from identifying energy efficiency problems before they waste money on heating and cooling. Sealing air leaks and adding insulation to problem areas typically reduces energy costs measurably.
What affects the cost of thermal imaging services
Property size is the primary cost driver; larger homes take longer to scan. Complexity matters too: homes with complex rooflines, multiple additions, or difficult-to-access areas cost more to inspect completely.
Return on investment through energy savings
Energy savings from addressing problems identified in a thermal imaging inspection typically exceed the inspection cost within 1-3 years. Sealing air leaks and adding insulation lower heating and cooling costs directly. Early identification also prevents costly problems like moisture intrusion, air leakage compromising indoor air quality, or thermal bridging causing condensation and mold.
Best Practices for Thermal Imaging Inspections
Professional-grade thermal imaging requires attention to camera specifications, proper scanning technique, and safety protocols. Understanding these best practices ensures your thermal map is accurate and actionable.
Camera resolution, sensitivity, and thermal map interpretation
Thermal camera resolution (320×256 pixels or better) captures finer details and allows detection of smaller insulation voids. Thermal sensitivity (0.05°C or better) determines how small a temperature difference the camera can detect, which matters when delta-T is marginal or when detecting thermal bridging.
Safety precautions when inspecting attics and crawl spaces
Wear a respirator rated for fiberglass particles when scanning insulated attics. Use a headlamp to navigate safely and avoid stepping through ceiling joists. Crawl spaces present moisture, mold, and structural hazards; inspect for standing water, active mold, or structural damage before entering. Wear protective equipment including gloves, respirator, and knee pads. Never inspect attics or crawl spaces alone; have a partner present.
Creating Your Post-Inspection Action Plan
A post-inspection action plan prioritizes problems by severity and cost-effectiveness. Categorize findings: immediate safety concerns (active moisture, electrical hazards, structural damage) require urgent attention. Energy efficiency problems should be prioritized by potential energy savings and repair cost. Estimate repair costs and energy savings for each problem. Sealing air leaks typically costs less than adding insulation but delivers faster payback.
Frequently Asked Questions
Can thermal imaging actually find insulation problems that a regular home inspector would miss?
Yes. Thermal imaging detects temperature differences caused by missing insulation, air leaks, and thermal bridging that are invisible during a standard visual inspection. A thermal camera reveals insulation voids, gaps in the building envelope, and air infiltration points by showing heat loss patterns. These issues often remain hidden behind walls and ceilings until thermal imaging exposes them through infrared radiation signatures.
What is the best time of year to conduct a thermal imaging inspection for home insulation?
Winter is ideal for detecting insulation problems. The greater temperature difference between inside and outside (delta-T) creates stronger thermal contrast, making heat loss more visible on the thermal map. A delta-T of at least 15-20 degrees Fahrenheit between indoor and outdoor temperatures provides optimal conditions for accurate thermal imaging. Summer inspections are less effective because smaller temperature gradients produce weaker thermal signatures.
How much does thermal imaging for a home inspection cost compared to a standard inspection?
Thermal imaging inspection cost depends on property size, complexity, and whether it’s part of a full home inspection or a standalone energy audit. Rather than a fixed price, most inspectors provide quotes based on your specific property and needs. Contact Zenith Property Inspections for current pricing and a personalized estimate for your home or investment property.
What are the main limitations of thermal imaging for detecting home insulation issues?
Thermal imaging cannot see through insulation itself—it detects temperature differences on surfaces. Environmental conditions matter: inadequate delta-T, direct sunlight, or recent temperature changes can create false positives and reduce accuracy. The technique also requires proper camera resolution and sensitivity to distinguish real insulation voids from normal thermal variations. A certified inspector with experience interpreting thermal contrast patterns is essential to avoid misdiagnosis.